Using Gmail SMTP with Cloudflare Email Routing: Step-by-Step Guide
In this guide, I’ll walk you through how to send emails through Gmail SMTP using Cloudflare Email Routing. This setup allows you to send and receive emails for a custom domain within Gmail, maintaining your professional brand without needing a separate email host. Follow these steps carefully to ensure a seamless setup.
Create Cloudflare-Routed Email Address
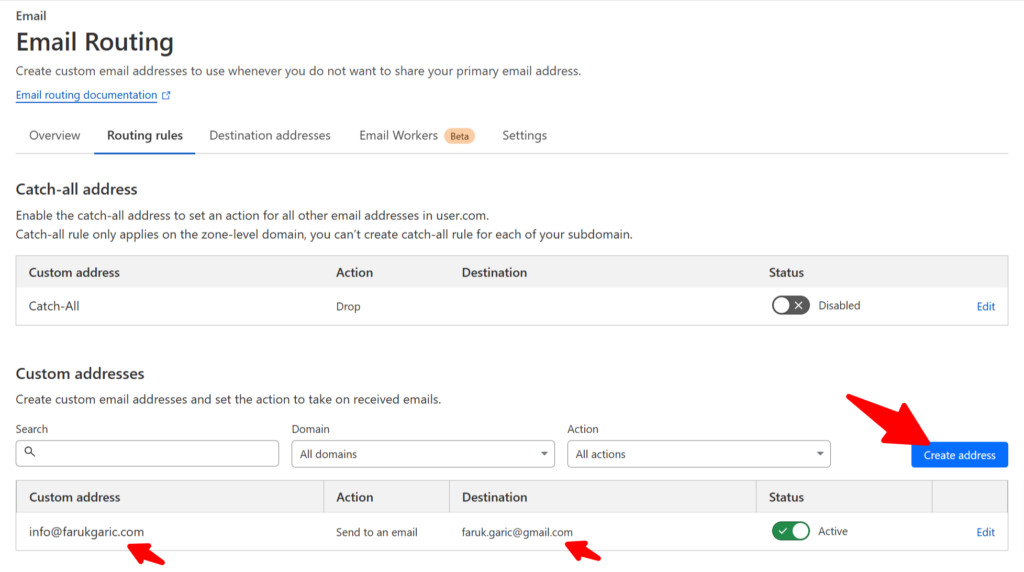
Login to your Cloudflare account and select your domain you would like to create a custom email address for.
- Select Email -> Email Routing in the left menu
- Click to Routing rules tab
- Click on the button “Create address” to create your address and to choose gmail destination account
Now when you added your email address and entered a destination gmail address let’s move to the implementation steps.
Enable Two-Factor Authentication (2FA)
To begin, ensure your Google account is secure by enabling two-factor authentication (2FA). This is a prerequisite for creating an App Password, which is needed for Gmail SMTP.
- Go to Google 2FA Settings and enable 2FA if you haven’t already.
- Follow the on-screen prompts to complete the setup, as this adds an extra layer of security to your account.
Create an App Password for Mail
With 2FA enabled, you’ll now create an App Password. This password will authorize Gmail to send emails on behalf of your custom domain.
- In your Google account, navigate to Security and find the App Passwords section.
- Select Mail as the app and choose your device.
- Click Generate to create a unique password for this setup.
- Copy the generated password and save it securely—you’ll need it in the next steps.
Add Your Cloudflare-Routed Email Address to Gmail
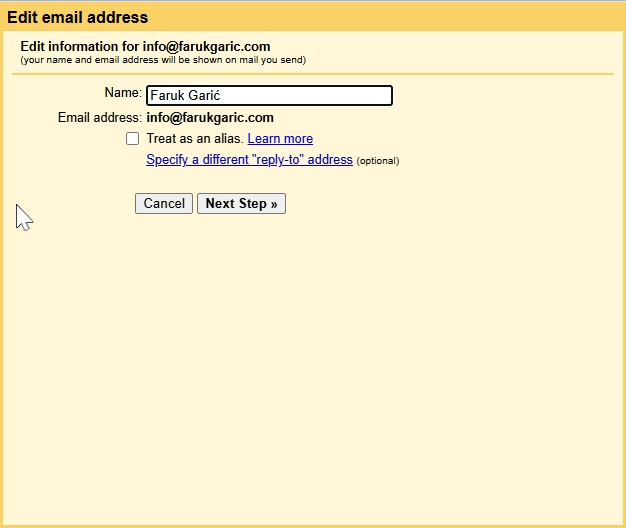
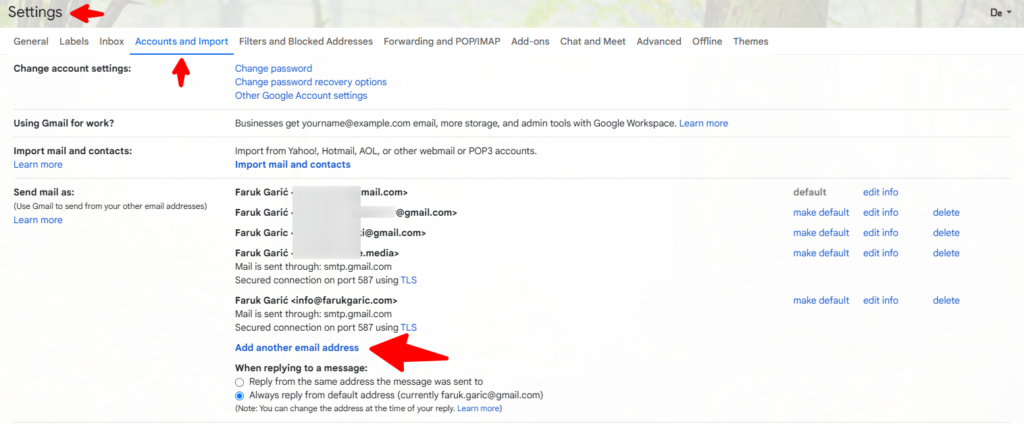
Now, it’s time to set up Gmail to send emails as your custom domain.
- Open Gmail and go to Settings > Accounts and Import > Send mail as.
- Click Add another email address and enter:
- Your name
- The email address routed via Cloudflare (your custom domain)
- Untick Treat as an alias and click Next Step.
Configure the SMTP Settings
After adding your email, Gmail will ask for SMTP server settings to connect and send emails through your custom domain. Here’s how to set it up:
- SMTP Server: smtp.gmail.com
- Port: 587
- Username: Your full Gmail address (e.g.,
[email protected]) - Password: Use the App Password generated in Step 2
- TLS: Leave enabled
Click Add Account. Gmail will send a verification code to your custom domain email address to confirm ownership. Simply enter the code provided in the Gmail dialog box or click on the link in the email to verify.
Setup SPF Records and DMARC Policy in Cloudflare DNS
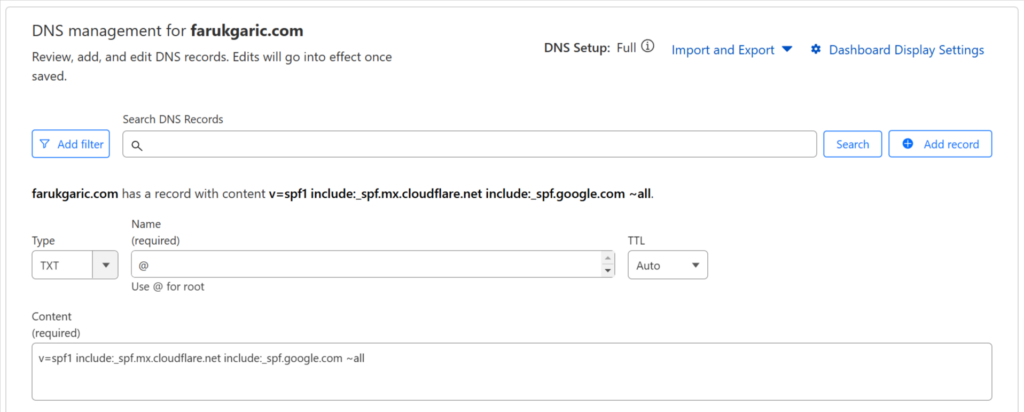
To ensure your emails aren’t flagged as spam, set up the SPF and DMARC records for your domain. This configuration in Cloudflare’s DNS validates that Gmail has permission to send emails for your domain.
SPF Record
- Go to Cloudflare’s DNS settings for your domain.
- Add a new TXT record with the following details:
- Name: @
- TTL: Auto
- Content:
v=spf1 include:_spf.mx.cloudflare.net include:_spf.google.com ~all
DMARC Policy (Optional but Recommended)
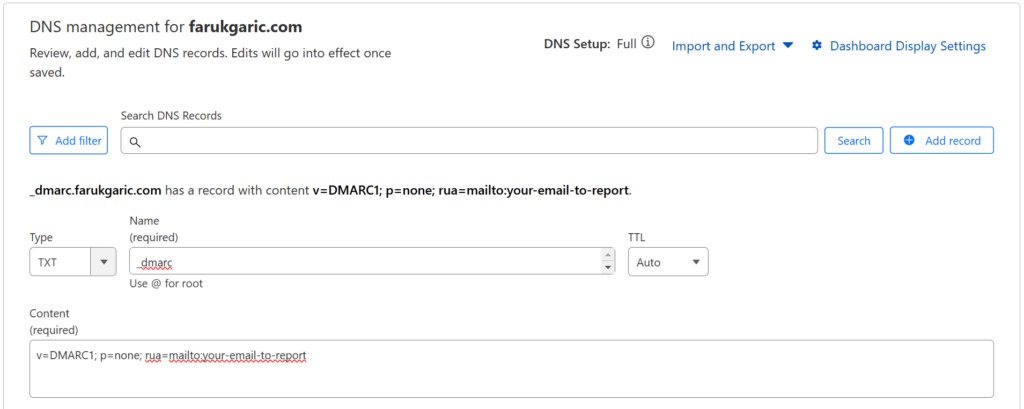
Setting up a DMARC policy can add another layer of protection, ensuring that unauthorized emails aren’t sent from your domain. For basic monitoring, create a TXT record:
- Name: _dmarc
- TTL: Auto
- Content:
v=DMARC1; p=none; rua=mailto:your-email-to-report
This configuration will help monitor your email traffic and ensure that outgoing messages comply with your DMARC policy.
This might be done automatically by Cloudflare. Check your DNS records to prove.
All Done!

With these steps completed, you’ve successfully configured Gmail SMTP with Cloudflare Email Routing. You can now choose your custom domain email in Gmail’s “From” field when composing emails, and Gmail will automatically select it for replies to incoming emails on that address.
Bonus: Setting Up WordPress SMTP with Gmail and Cloudflare
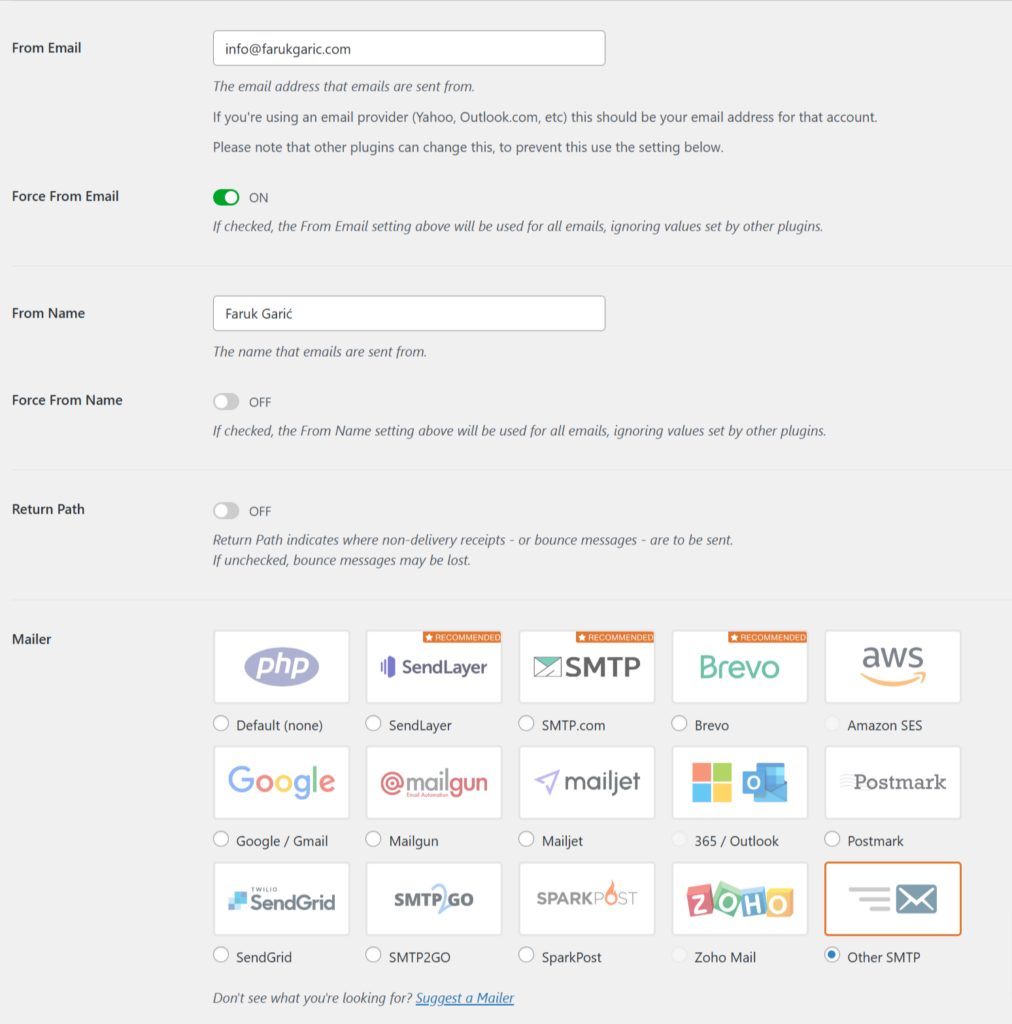
If you use WordPress and want it to send emails using your custom domain, you can configure SMTP with the same Gmail setup.
- Install a WordPress SMTP plugin like WP Mail SMTP.
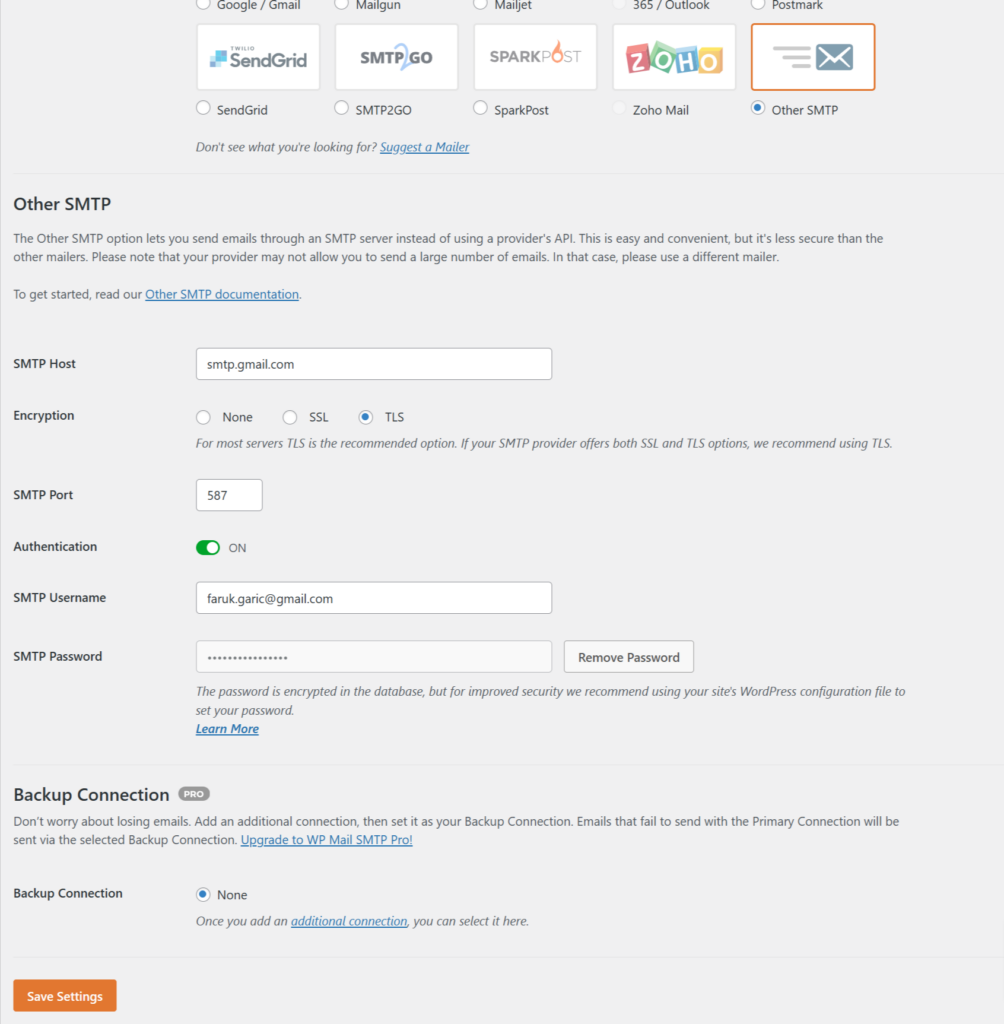
- In the SMTP settings:
- SMTP Host: smtp.gmail.com
- SMTP Port: 587
- Encryption: TLS
- SMTP Authentication: Enabled
- Username: Your Gmail address (e.g.,
[email protected]) - Password: Use the App Password generated earlier
Now, WordPress will send emails from your custom domain via Gmail’s SMTP, ensuring your website notifications and contact forms look professional.
Sources:


Comments
Comments are disabled for this post